Do you want to protect your Elementor forms from spam and bots? If so, then it’s time to look into Google reCAPTCHA. This handy tool from Google can help secure your website by verifying that each form submission is made by a real person.
In this blog post, I will show you how to add Google reCAPTCHA in Elementor forms step-by-step. I will also explain what Google reCAPTCHA is and why it is important for website security. So let’s get started!
Table of Contents
Understanding Google reCAPTCHA
Google reCAPTCHA is a powerful security tool that can protect your website and its users. Many websites use reCAPTCHA to protect against bots, spammers, and automated scripts that can threaten site security. Google has two versions of reCAPTCHA: v2 and v3.
Google reCAPTCHA v2
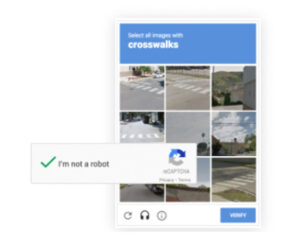
Google reCAPTCHA v2 displays a challenge in which the user must select images or click boxes for verification. The system uses advanced risk analysis techniques to determine whether the user interacting with the site is a human or an automated script.
Google reCAPTCHA v3
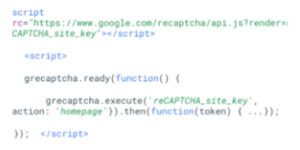
Google reCAPTCHA v3 runs continuously in the background, using adaptive risk analysis based on user behavior to verify the user instead of displaying a challenge. This difference makes v3 more secure with fewer privacy implications than v2 and also provides better experience for legitimate users.
Why is Google reCAPTCHA important?
Google reCAPTCHA is an important website security tool because it helps prevent malicious bots and scripts from submitting forms or creating accounts. This can help protect website content, as well as user information such as passwords and payment data. Additionally, Google reCAPTCHA can help reduce the amount of spam in your website’s inbox, making it easier to manage website messages.
Setting up a Google reCAPTCHA account
Setting up a Google reCAPTCHA account is an important security measure to ensure secure interactions with customers or other visitors to your website. The initial step is to determine the version that best meets your needs, either v2 or v3.
In order to set up your account, you will need to go through the Google registration process:
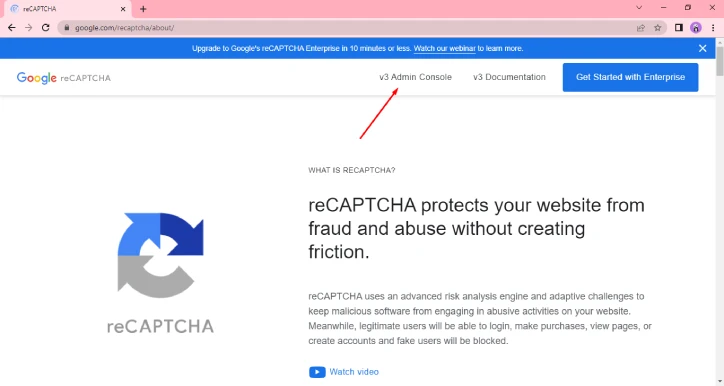
- Go to Google reCAPTCHA website.
- Click v3 Admin Console.
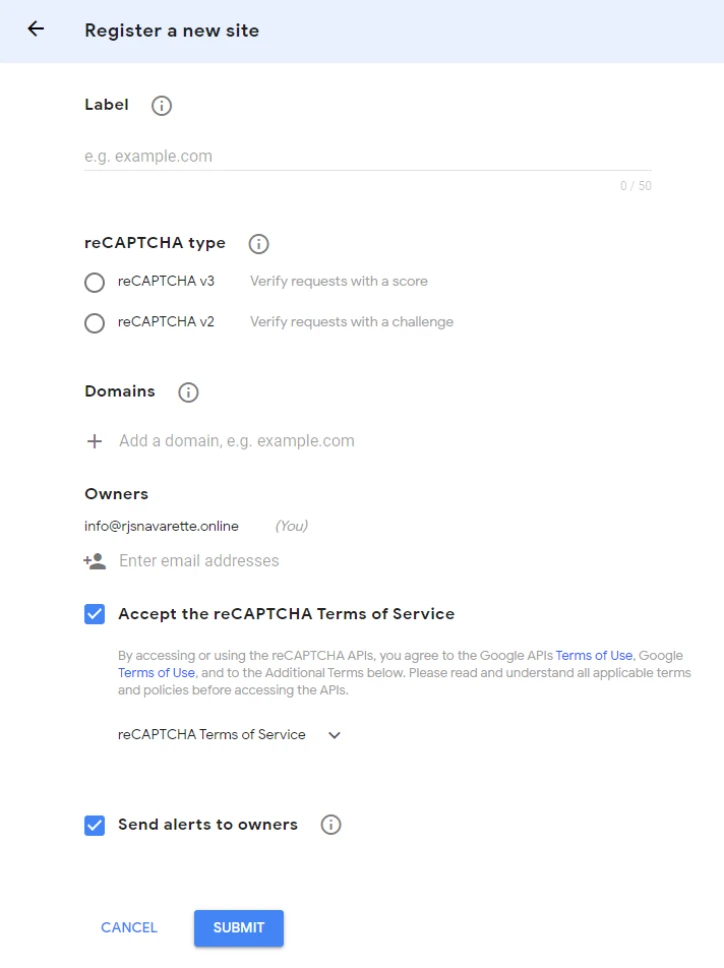
- Fill up the Register a new site form details. You may opt for version two (v2) or three (v3), and then click submit to complete your registration.
Congratulations! You have successfully set up your Google reCAPTCHA account. You should now have a site key and secret key, which will be used later on in this guide.
Adding Site and Secret Key of Google reCAPTCHA in Elementor
Adding Google reCAPTCHA site keys and secret keys to Elementor is an efficient way to provide extra security for your website and protect it from spam. It can be done easily, as long as you have both the key and secret code.
- Make sure you have the copy of your Google reCAPTCHA site and secret key.
- Login to your WordPress website.
- In the left sidebar, hover your mouse in Elementor then click Settings.

- Click Integrations.

- Scroll down and enter your Google reCAPTCHA Site Key and Secret Key.
- reCAPTCHA is for Google reCAPTCHA v2.
- reCAPTCHA V3 is for Google reCAPTCHA v3.

- Scroll down and click Save Changes.
Congratulations! You have successfully added your Google reCAPTCHA Site and Secret Key in Elementor.
Adding Google reCAPTCHA in Elementor Forms
Elementor forms are an easy-to-use, user friendly tool for website development and building. Adding a Google reCAPTCHA field to these forms helps ensure the security of websites by distinguishing human users from automated bots. This can be done in a few simple steps:
- Click your Elementor Form.
- In the left sidebar, go to Content > Form Fields > Click Add Item.

- In the Type field, choose either you want reCAPTCHA or reCAPTCHA v3.

- Click Update to apply the changes.
You now have successfully added Google reCAPTCHA in Elementor form.
Testing the functionality of your forms with Google reCAPTCHA enabled
Once you’ve enabled Google reCAPTCHA in your Elementor Form, it is important to test the functionality of the form. To do this:
- Fill out the form with required information.
- Submit your form.
- Check if a recaptcha challenge appears (v2) or if the recaptcha field is successfully filled by v3 recaptcha.
- If the recaptcha challenge is successful, the form should submit without any issues.
Congratulations! You have successfully enabled Google reCAPTCHA in Elementor Form. This will help protect your website and user information from malicious bots and scripts, while also providing a better experience for legitimate users.
Conclusion
Google reCAPTCHA is an important security measure to help protect websites from malicious bots and scripts. By enabling recaptcha in Elementor, you can ensure that your website’s forms are secure while also providing a better experience for legitimate users. With the simple steps outlined above, you can easily set up recaptcha in Elementor to help protect your website.
If you have any further questions or need assistance, please feel free to contact us. We are here to help!


One Response
Great article! Integrating reCAPTCHA in Elementor is so important for website security and preventing spam. I appreciate the clear and concise instructions provided in this post. The step-by-step process makes it easy to follow and implement. It’s also great to see the different options available for integrating reCAPTCHA, including v2 and v3. Thanks for sharing your knowledge and helping us keep our websites safe and secure!